Designing and Creating a Phone Holder
Adobe Inventor is a computer program that allows you to virtually design 3D objects. It is used - along with a similar program called Maya - to design parts for manufacturing and architecture, among other things, and is a very good program to use if the end goal is to 3D print. For this task, there were several options to choose from, and I chose to make a decorative holder for my phone.
Note: I messed up and forgot that the maximum size to 3D print on our machines is 5 inches, so I made mine 6 inches. Due to me ending up fixing the problem part way through, some of the screenshots present incorrect information for the final product. Up through step 14, the length of it says it is 6-6.5 inches. From step 15 onward, it displays the correct size.
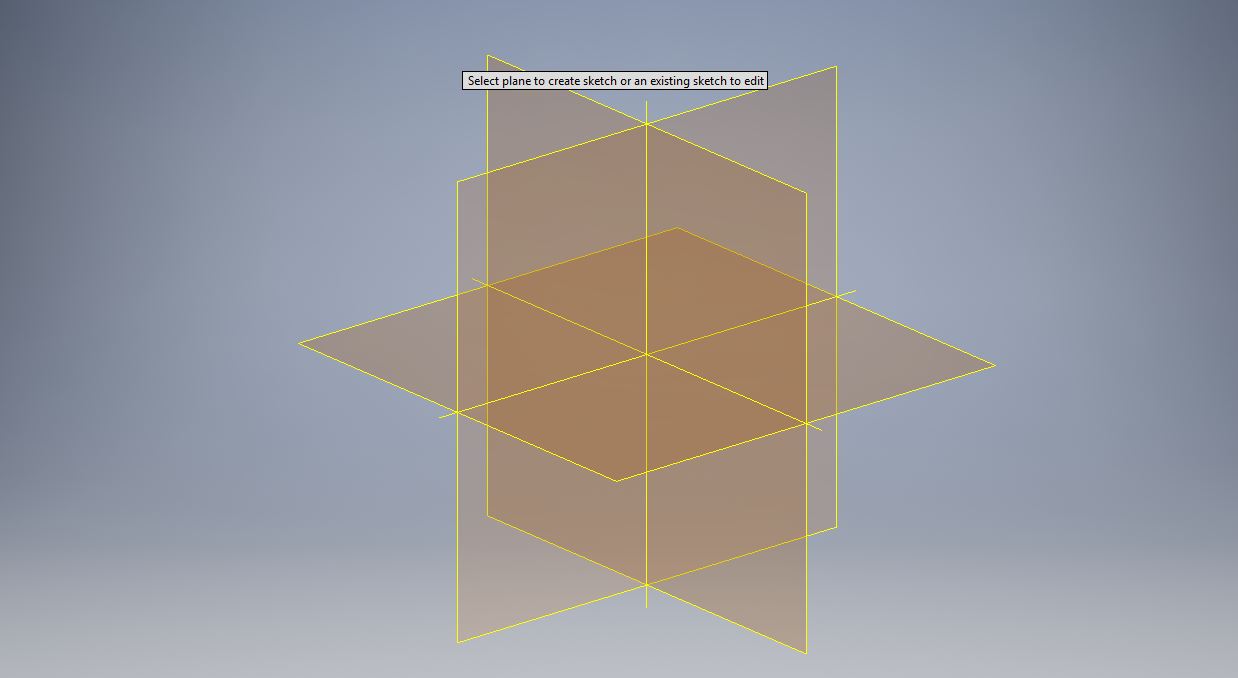
The first step to create anything in Inventor is to start a 2D sketch and select the plane you want to start designing on.
The first step to create anything in Inventor is to start a 2D sketch and select the plane you want to start designing on.
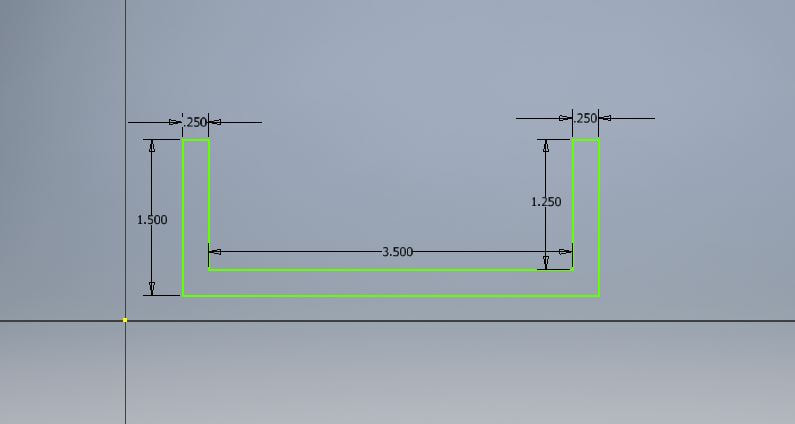
Next I created to initial base outline of my design.
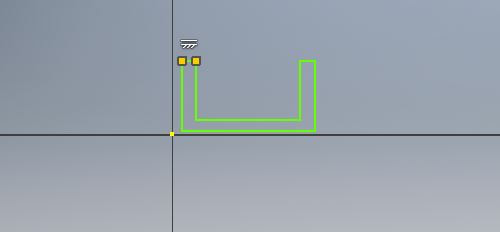
I entered dimensions in to make sure it was the proper size.
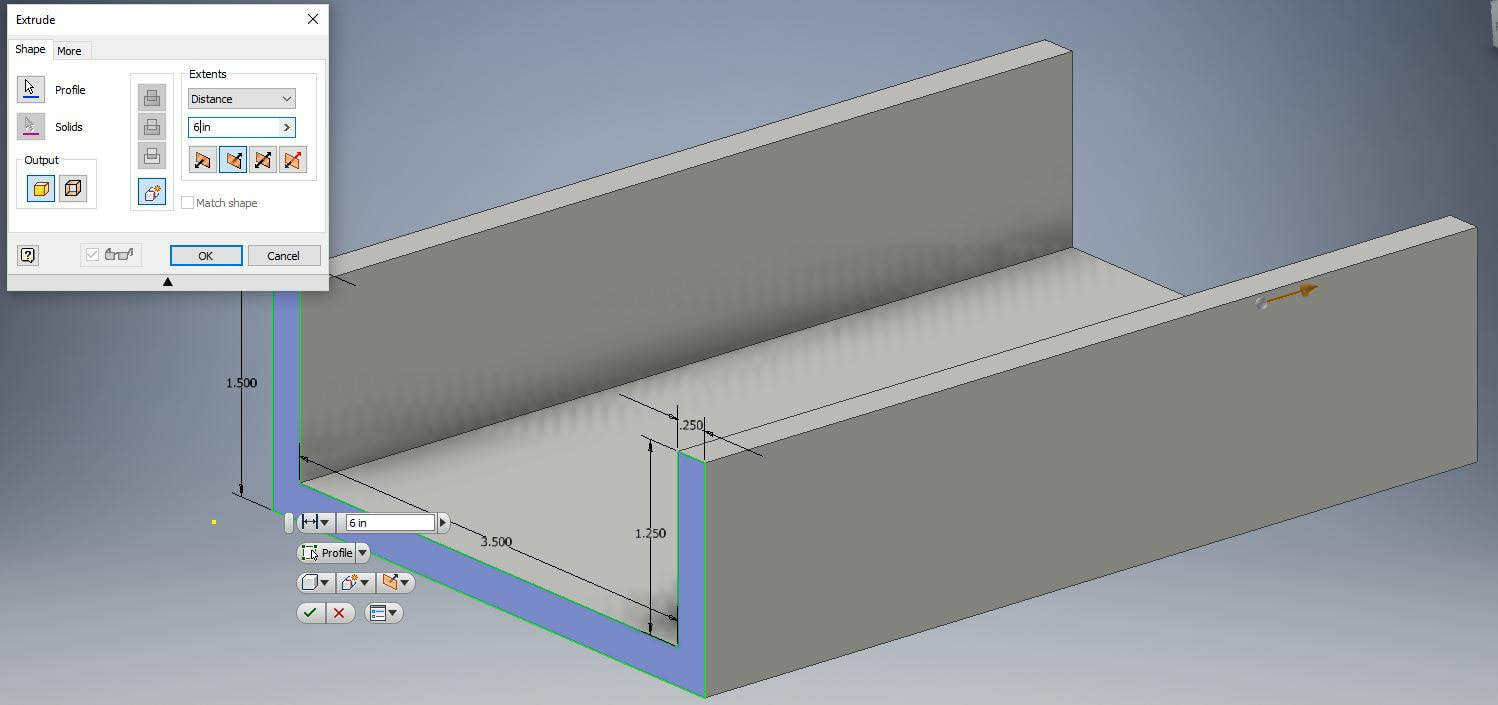
Next I extruded it to make it the proper length, and also where I made the first of my errors. The length of it at this point was 6 inches, over the designated size limit. I later fixed this problem.
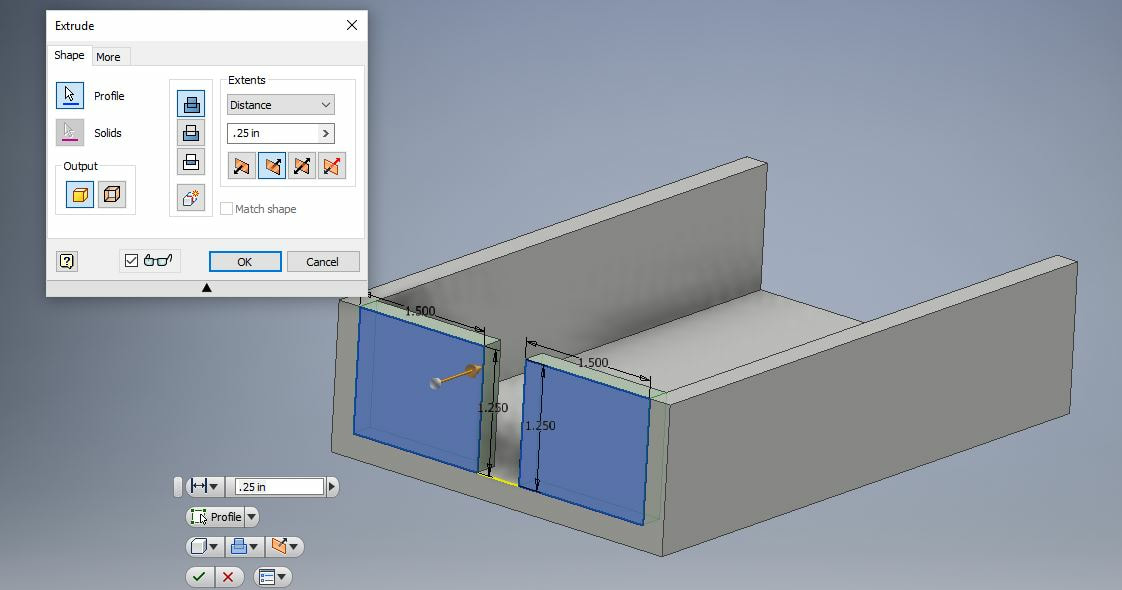
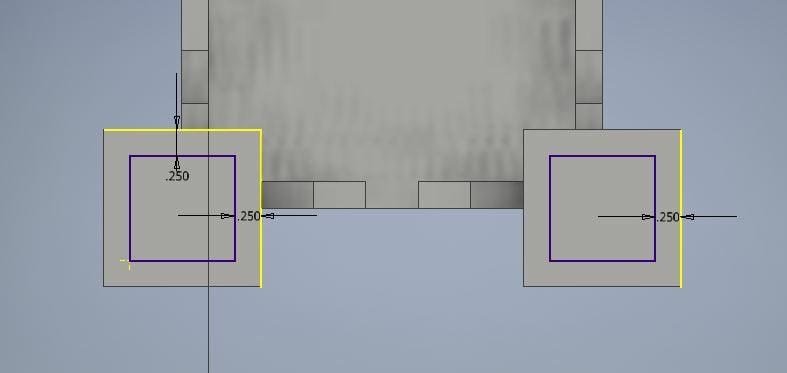
Next I created a new 2D sketch on the back end to create the blocks for where the charger would go through.
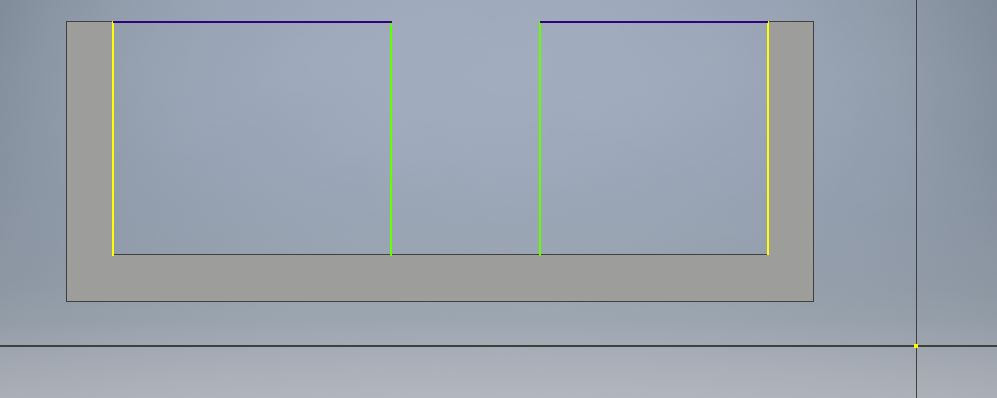
I entered dimensions to make sure that it would be the proper size.

I extruded the same thickness as the rest of the shape.
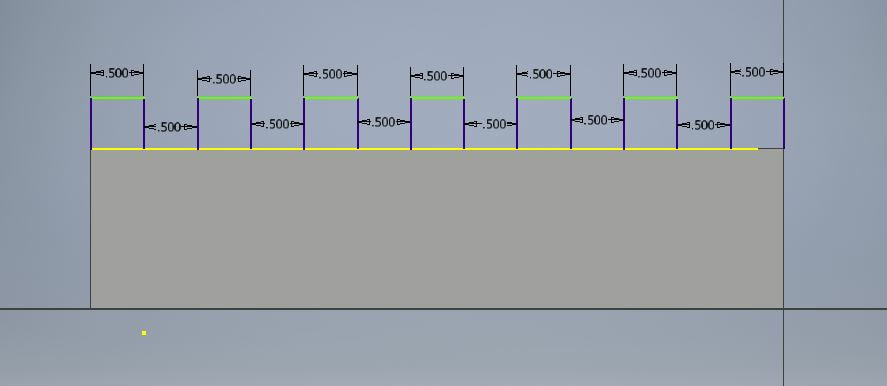
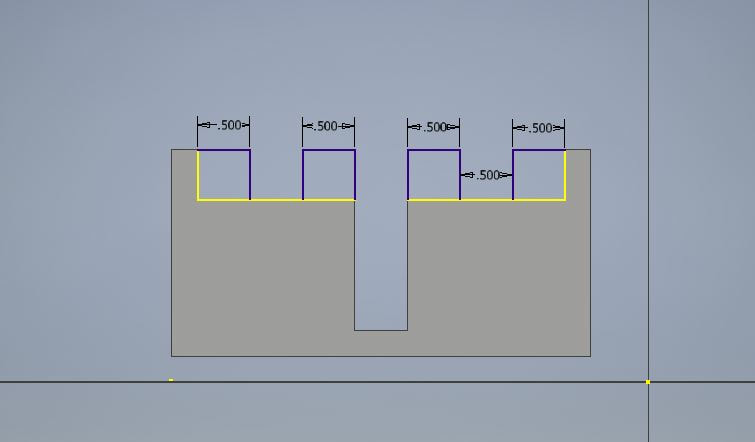
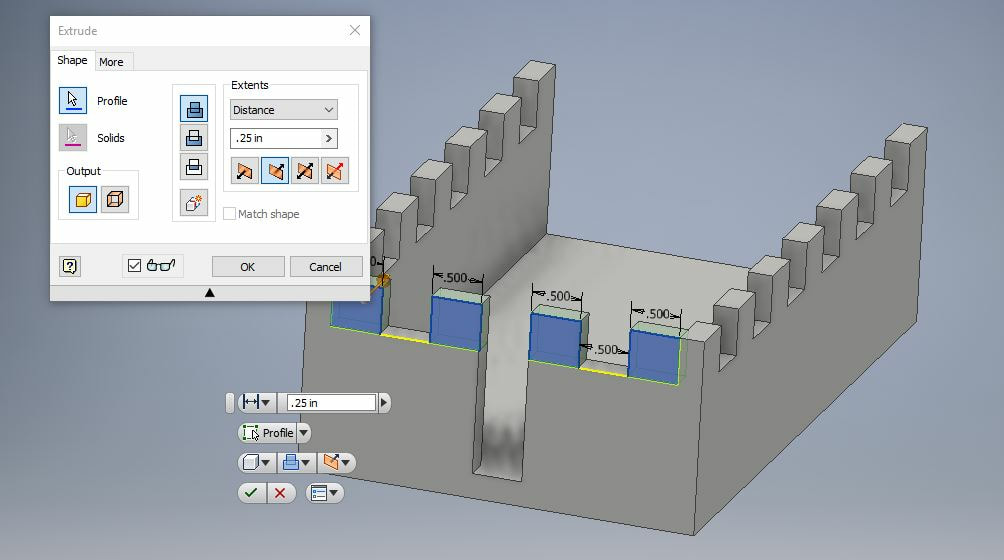
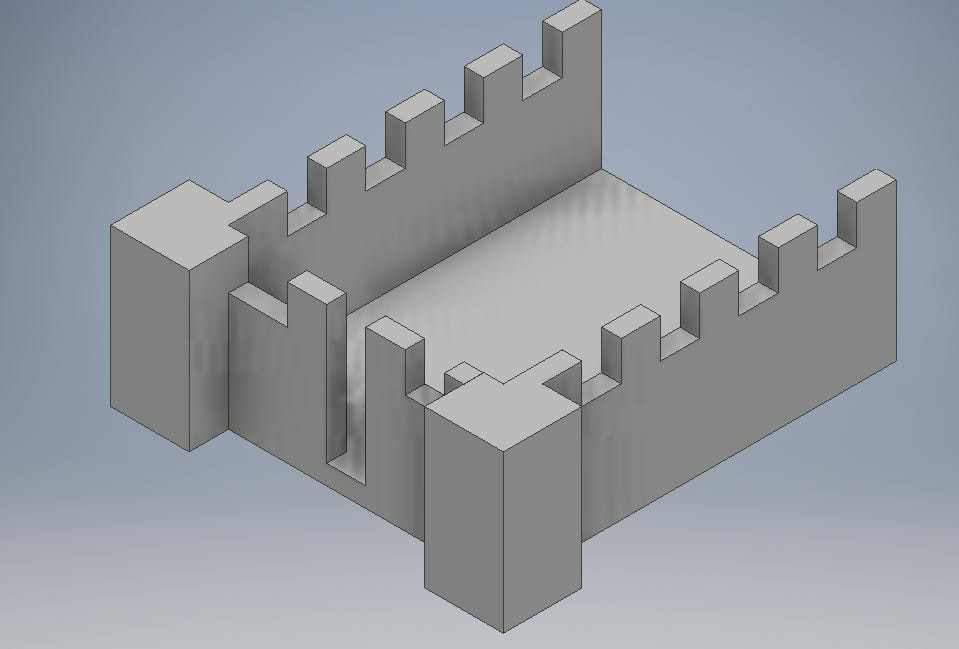
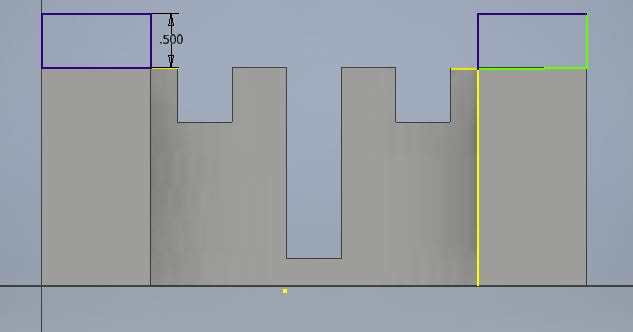
I wanted to make a castle type design, so I added battlements, which were used in castles as a slot that arrows or other weapons could be fired through. This was still when the design was too long, and I ended up having to completely start over because Inventor was being kind of finicky.
Next I extruded them.
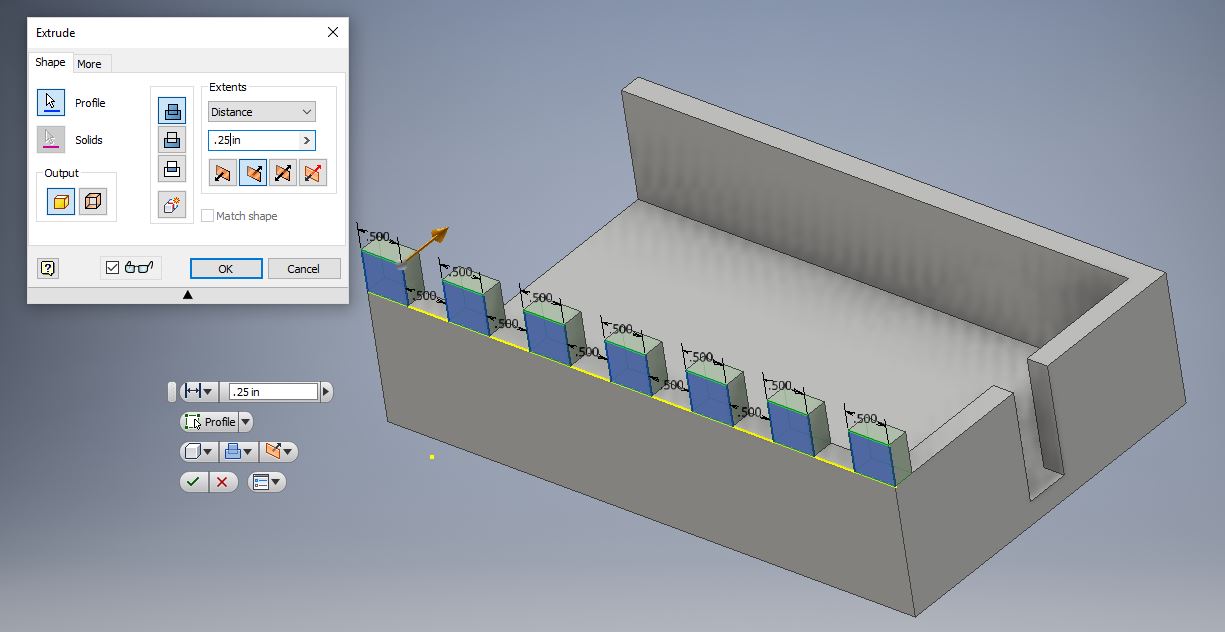
Next I created and extruded the battlements on the back end.
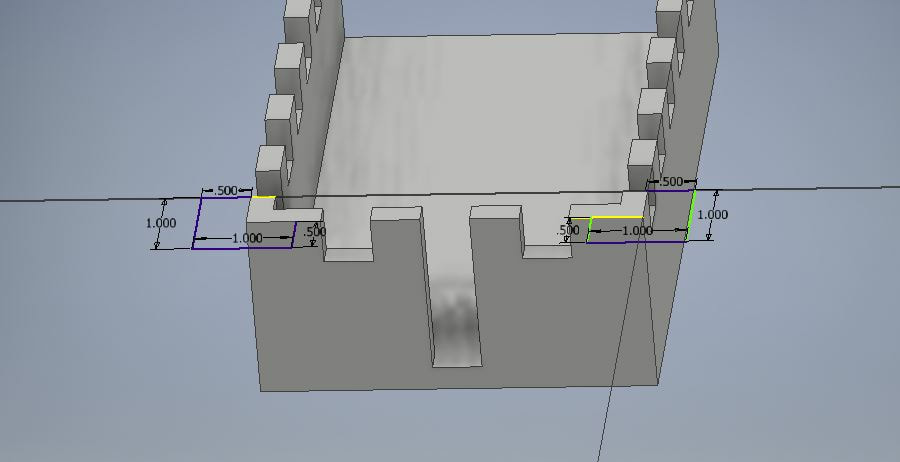
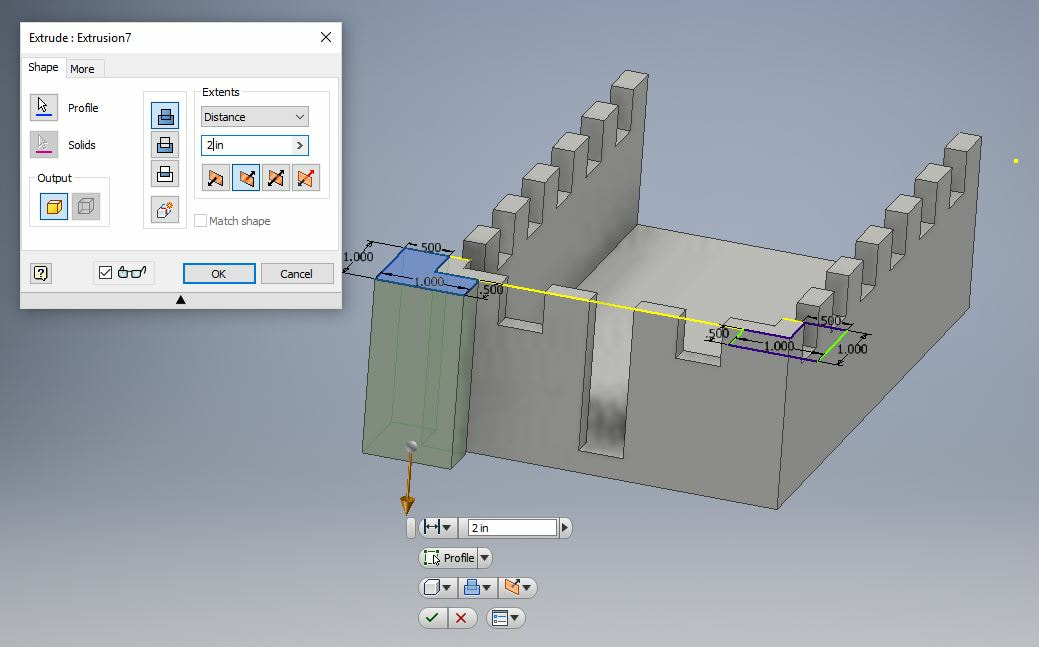
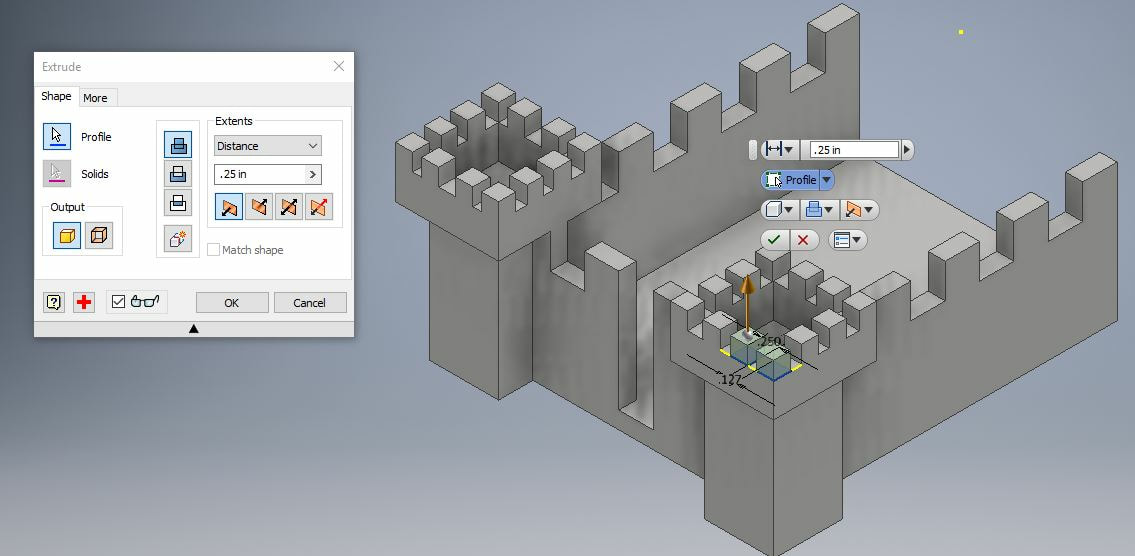
Next I created turrets to enhance the design. Turrets were used as added defensive measures shield walls from incoming fire, but as their military use faded, they became purely decorative.
This is what they first look like with the proper length.
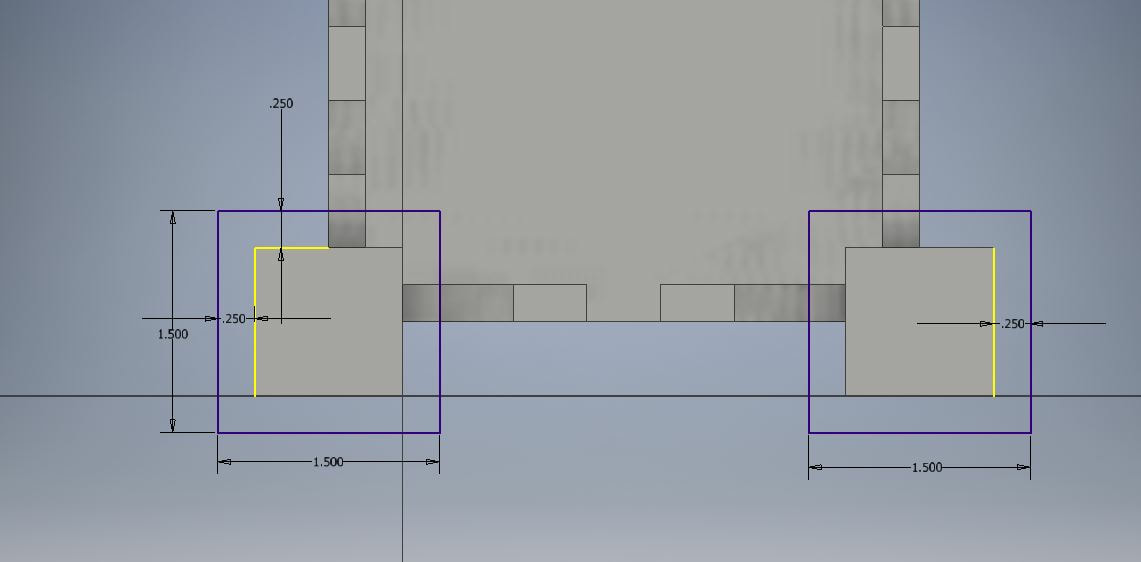
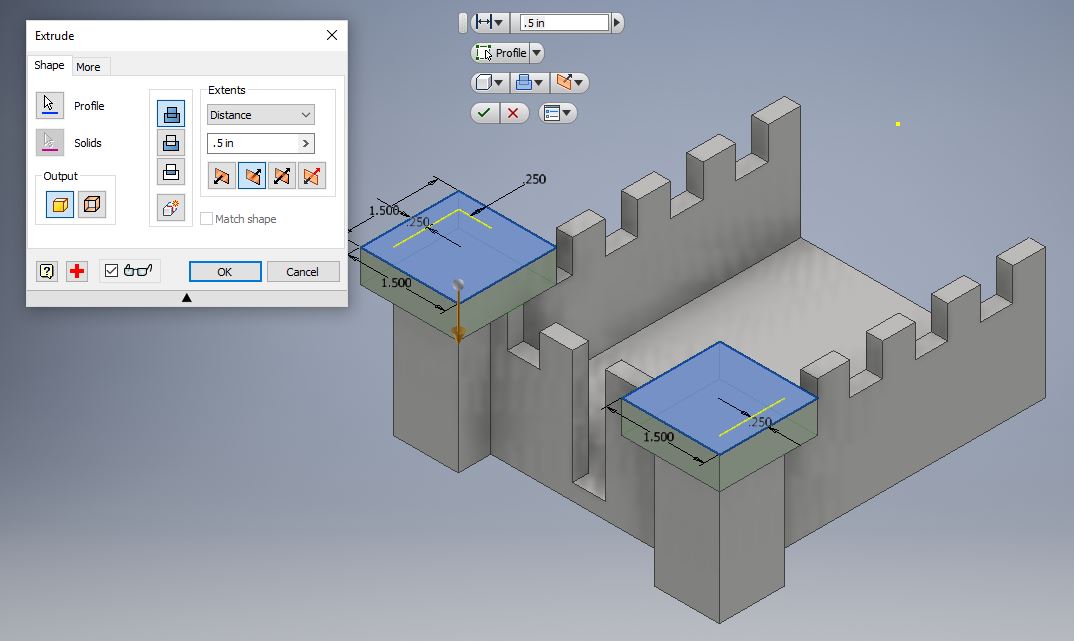
Next I added the beginnings of the sections on top of the turrets.
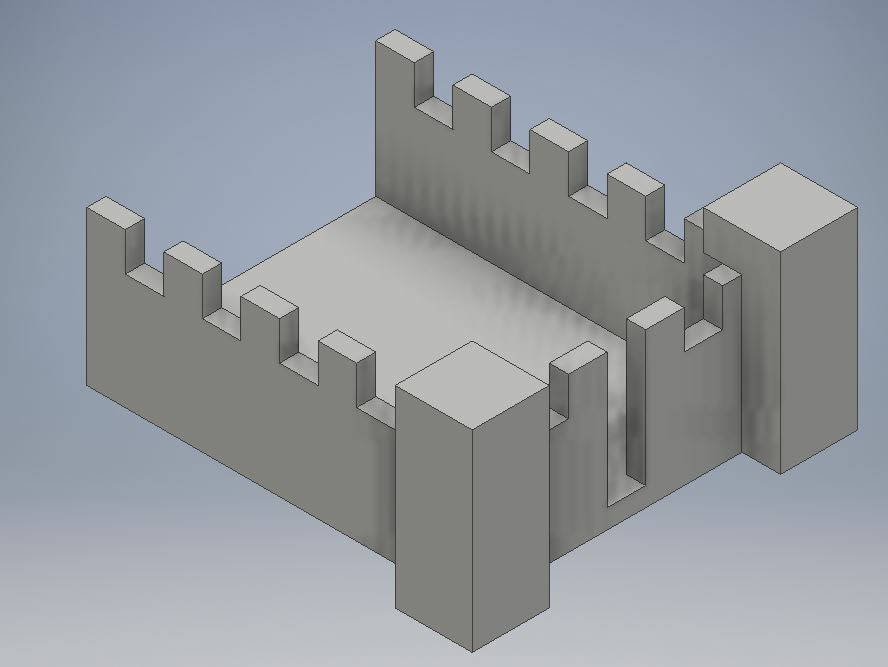
It looked kind of weird if I just left them straight up, so I added a little overhang.
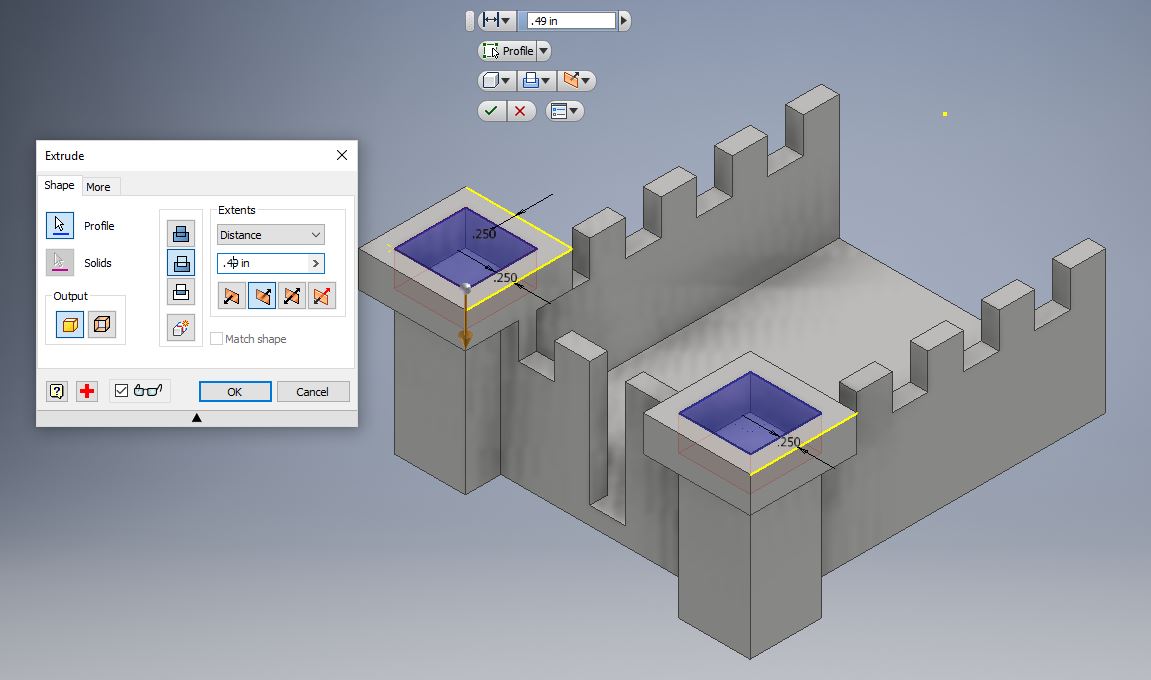
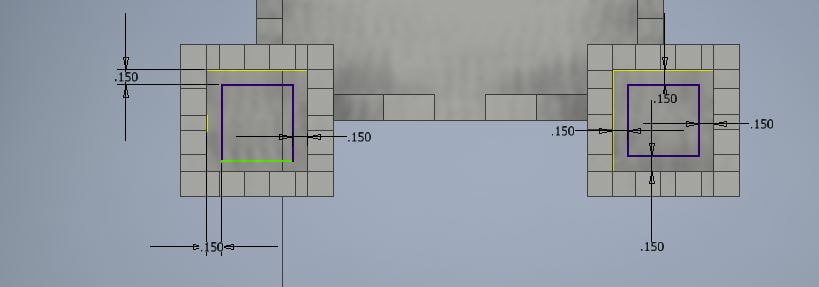
I "drilled" holes, if you will, into the center to conserve printing filament (and also because it looks better).
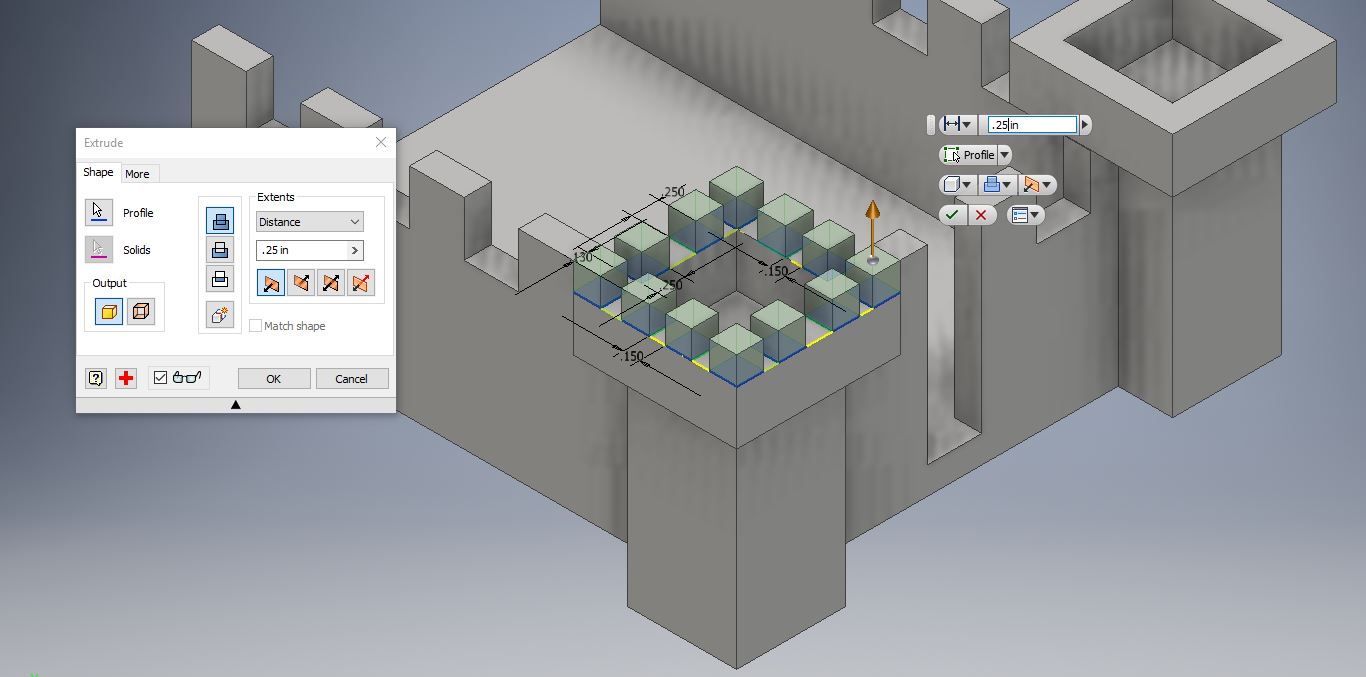
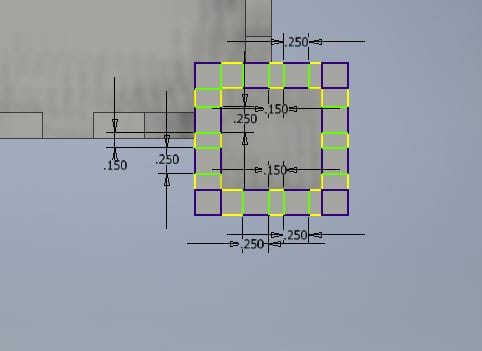
I also added mini battlements on the top of the turrets. This proved to be more difficult than it would seem because it took me several tries to get it so they would extrude properly. In previous tries either they wouldn't extrude at all, they would all be connected, or only some would extrude.

I then had to repeat that nightmare on the other side. It was only after I did this that I discovered the "Copy" tool.
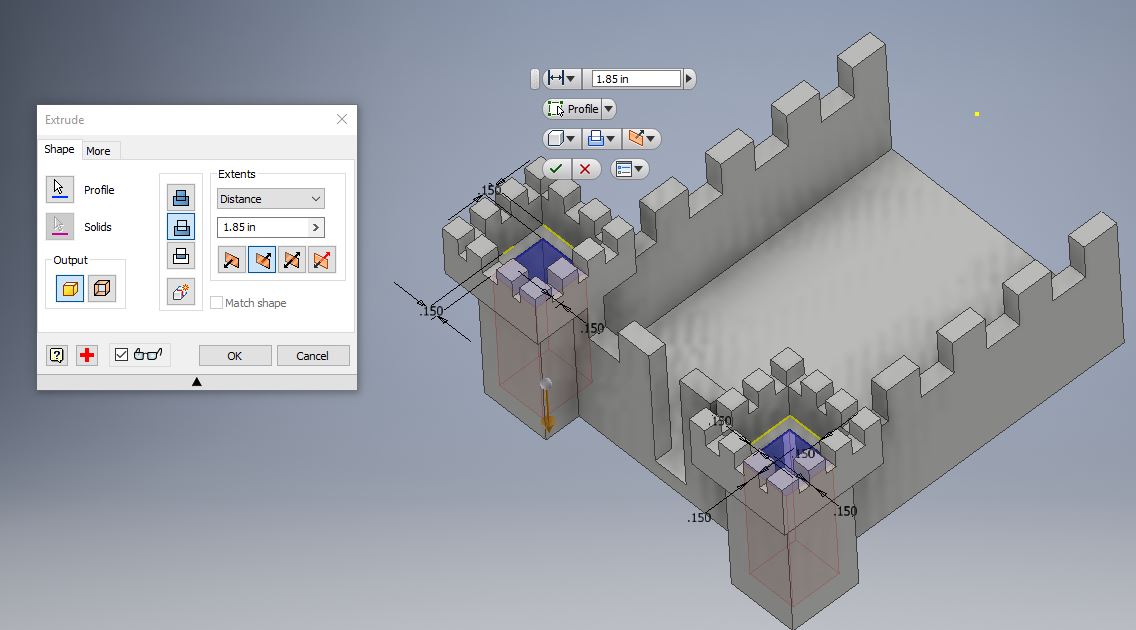
Once again I created a hole in the center of the turrets, but this time it goes all the way through. This was to save filament, but also to maybe be a storage place for really tiny things.
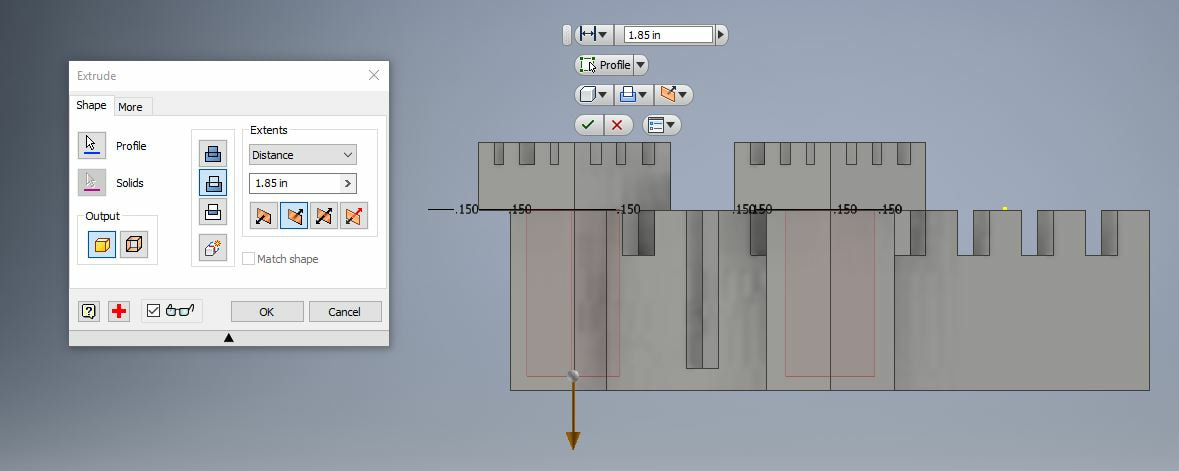
The difference with this extrusion is that instead of adding onto it like the other ones have been, this one cuts away.
|
|
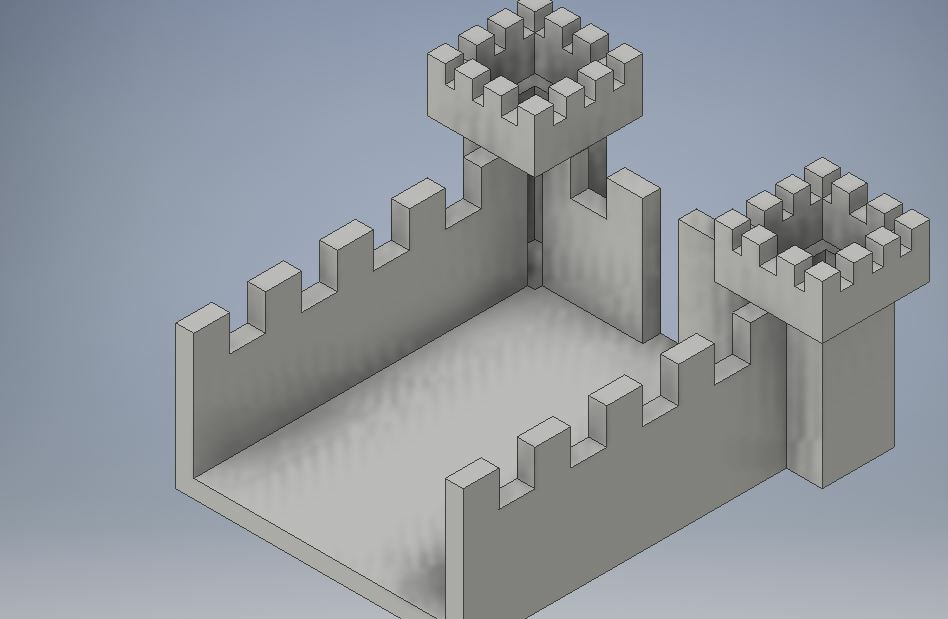
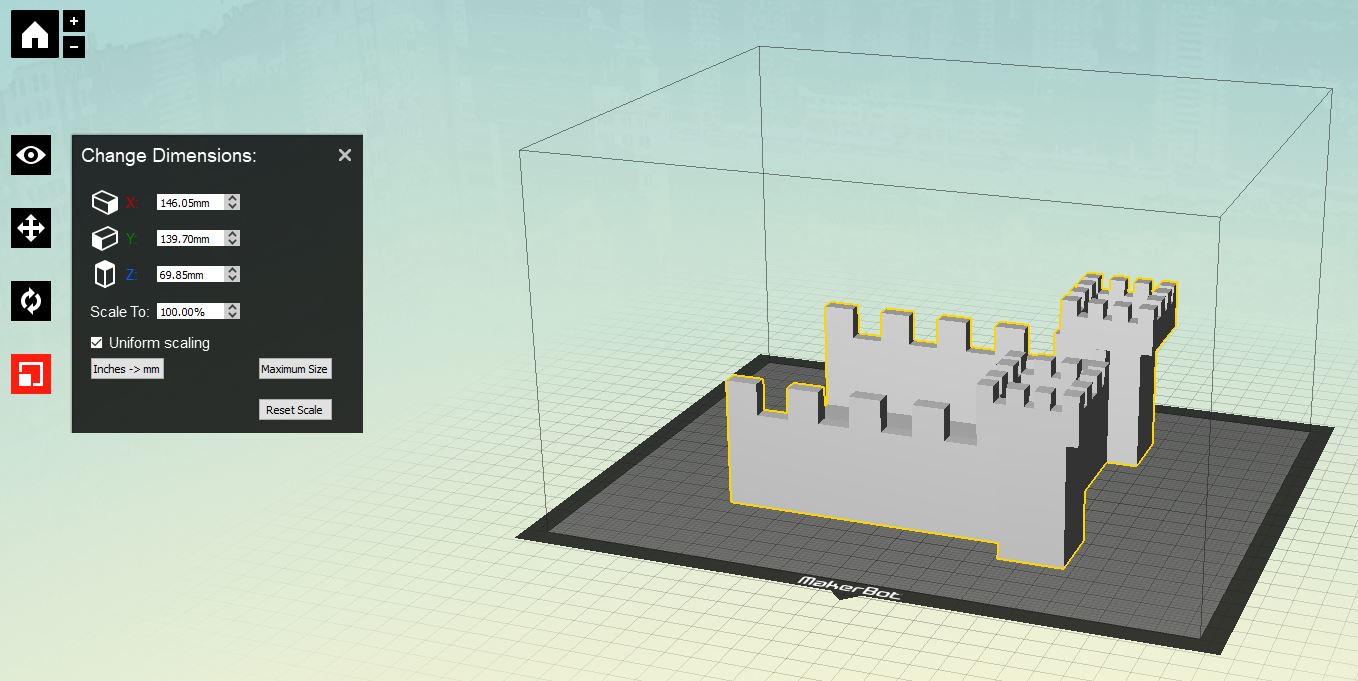
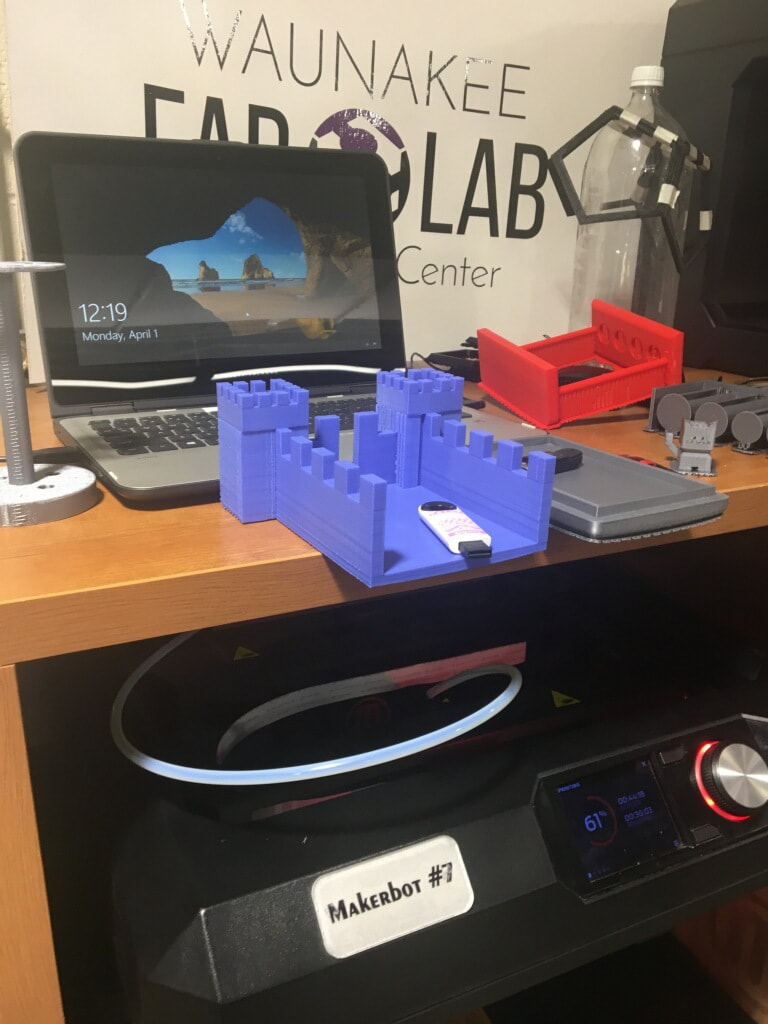
This is the final design! I noticed that there were holes in the corners that I had tried to avoid, but I was in a little bit of a time crunch so I didn't bother trying to fix those.
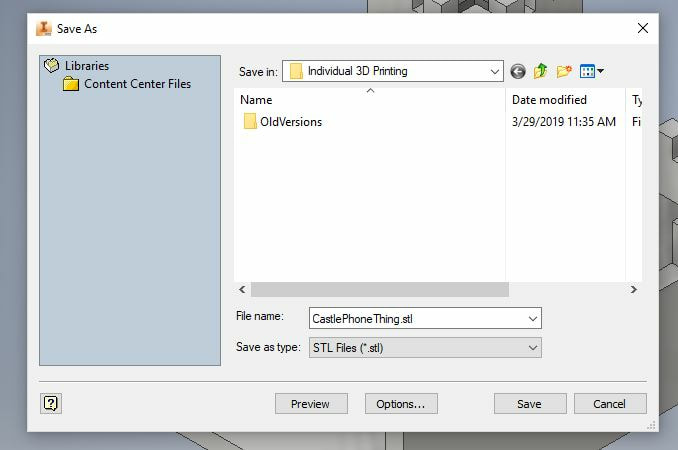
Next I had to save it as a file type that I could export to the MakerBot software.
I uploaded it to the MakerBot software and manipulated everything so that it would lay flat and be oriented the proper way.
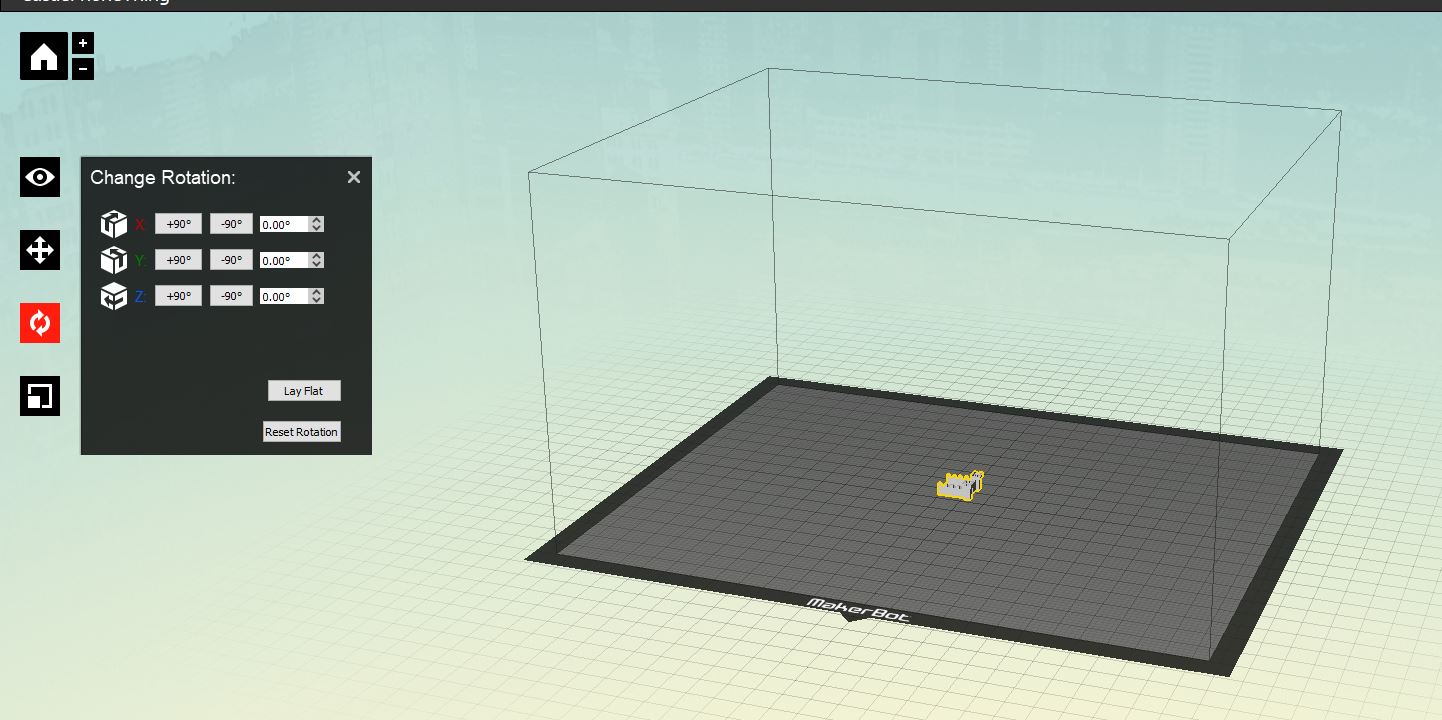
I changed the size to 1000%, so it would be to full scale.
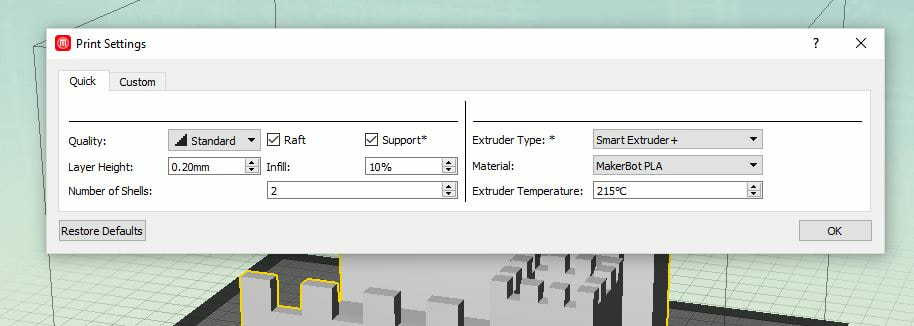
When I finished, I made sure that all the print settings were right. Since I had the overhangs on the turrets, I had to turn on supports because the machine can't print off of thin air.
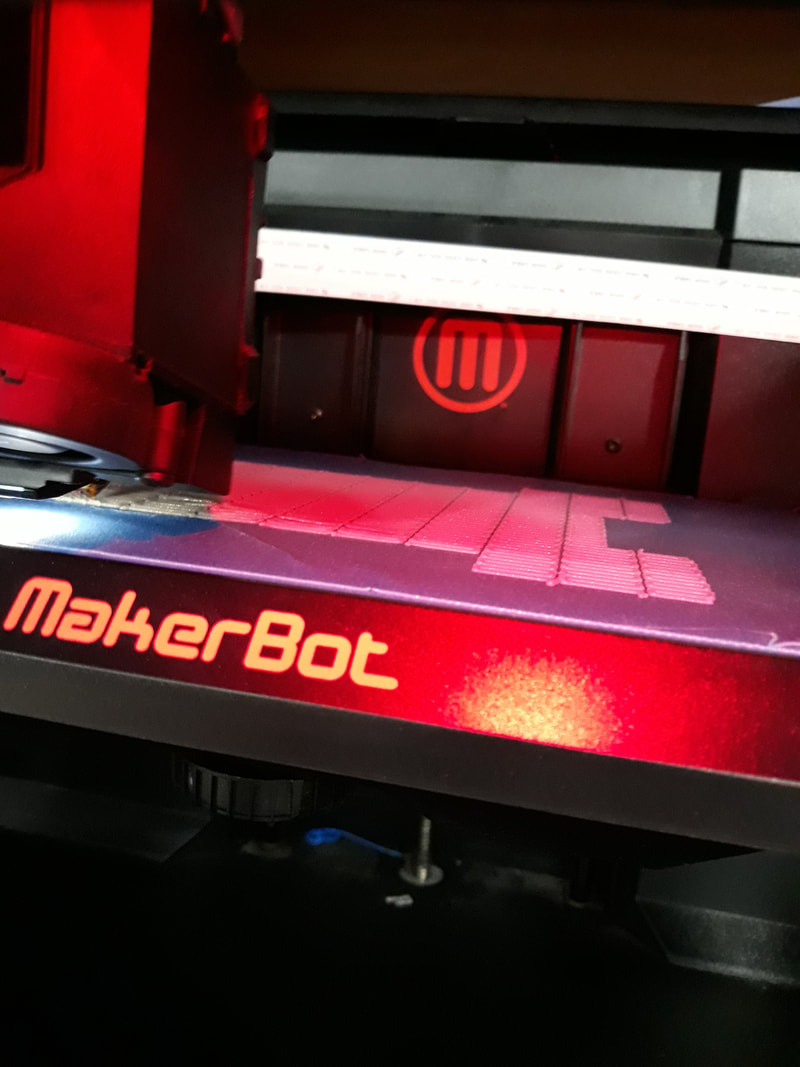
Here is the base starting to print.
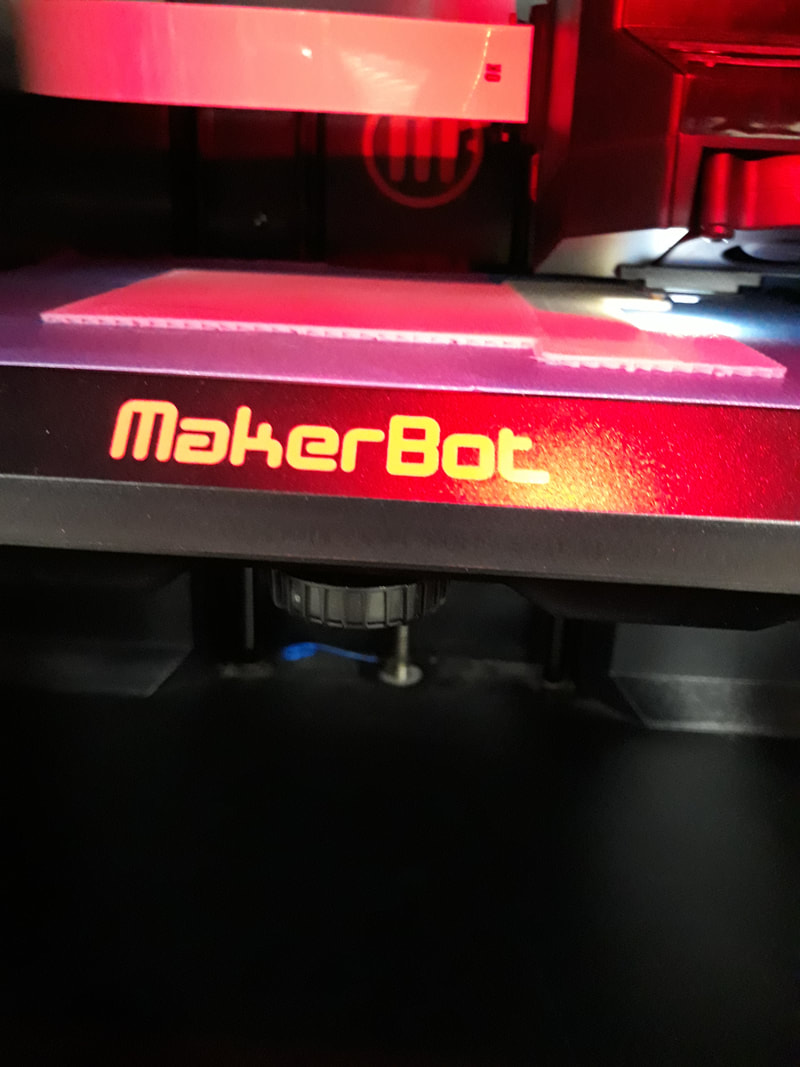
This is the actual item printing. I don't have any pictures of it printing later than this, because the print time was over 11 hours, and I didn't have permission to stay overnight at school and watch it print.
And the final design! It was quite difficult to get the supports off in some places, but I still think it looks really cool. I'm a huge fan of the color.
|
